Making GMT custom symbols (Part II)
We are going to create another, and much more elaborated custom symbol to use in GMT. Please note that to reproduce this example it is necessary to have a Mirone version updated to 12 January 2016 or later, and for the second part of this a GMT updated to 12 January will be necessary as well.
The Corto Maltese image
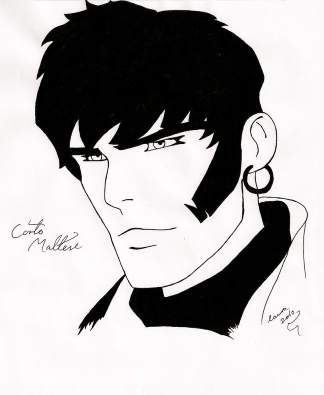
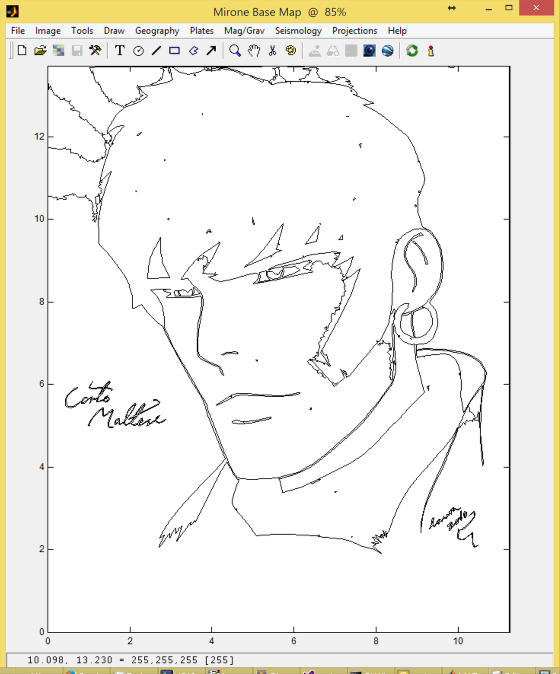
I found this image with Google images and this is what we are going to reproduce as a GMT custom symbol in this tutorial. For that we will use some external help. The http://vectormagic.com/home page let you automatically digitize the above image. The result can be exported in DXF and directly loaded in Mirone and will look like this.
Vector art
At this point we could already save this as a GMT symbol but it would be very inefficient because unfortunately the output from vectormagic comes as a myriad of line segments that are even repeated. Besides, we also want to to clean the noise around the head. So we will first do some preparatory and cleaning work. The first step will be to remove the duplicated lines (there are many).
Deleting repeated lines
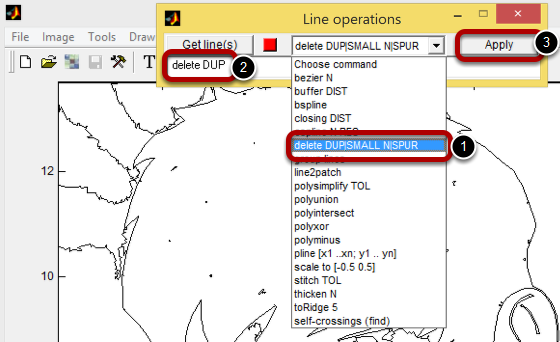
Call the "Line operations" tool by clicking "Tools -> Line Operations". That will bring the little window shown above. From its pop up button select the option as shown and next edit it to read only "delete DUP" (means delete the duplicates). Next hit Apply and wait.
Stitching the lines
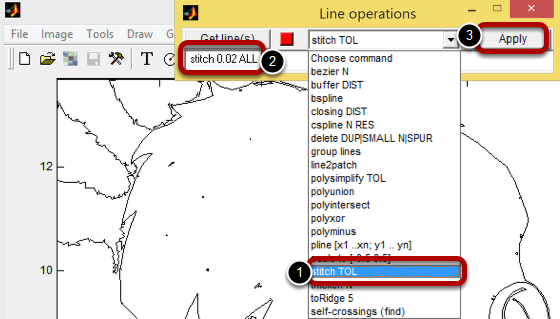
We are now ready to stitch all line segment into a reduced number of polylines. Follow the image and at step 2 edit the command to read "stitch 0.02 ALL". It means stitch ALL lines that are close to each other by less than 0.02 units. At this point it's convenient that we do some line editing. Double-clicking onto a line turns it into edit mode, like the figure below. Once in edit mode a click on vertex makes it the active vertex (shown with a black square).
Edit lines
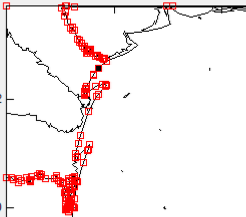
Now using the keyboard we can break the polyline (hit 'b' key), remove it ('r') insert a vertex ('i") or move up and down along the line ('n' or 'p'). Plotting a rectangle and right-clicking on its edge allows to "delete inside rect" which is very handy to delete groups of lines. Using this commands I cleaned the image quite a bit.
A reminder, Mirone has no Undo but you can save the state of your current work in a Session ("File -> Save Session") that you can reload later and resume your work.
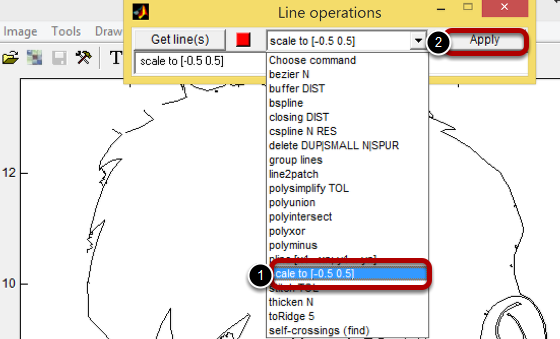
We are now ready to convert our current work into the [-0.5 0.5] interval, which is the same as saying to convert to the GMT symbol tool. Do as above and ...
Convert to the GMT symbol tool
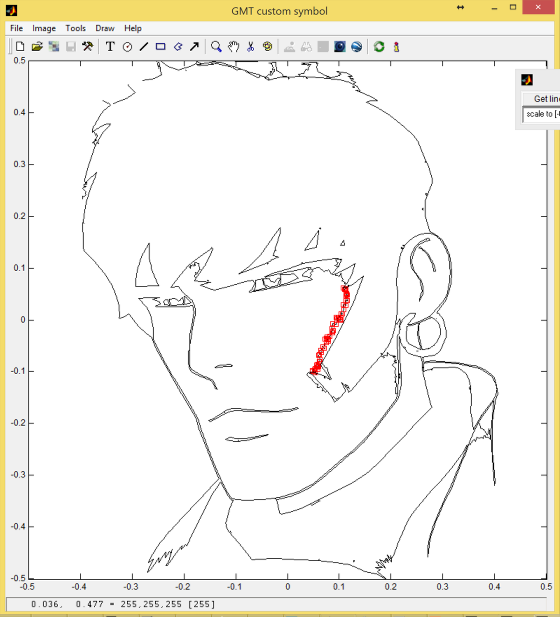
The previous cleaning work was not complete and we can do some more here. The red dots above are from a noisy line (there are others). Once identified and if they can be easily deleted by putting them in edit move and than hit the keyboard "delete" key. Once satisfied we are done and can save the symbol by doing "File -> Save GMT script -> .def symbol".
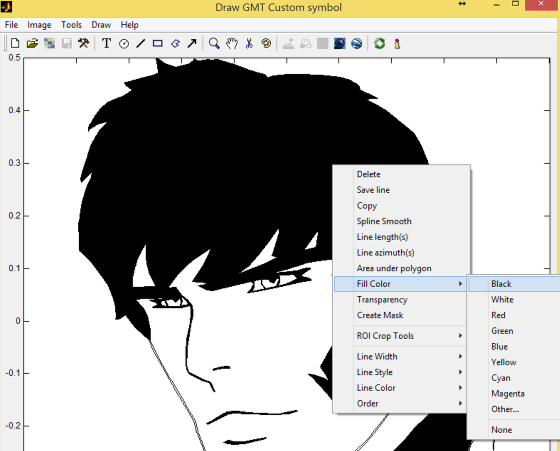
But I'm not satisfied and will embellish (and complicate) our symbol. I won't show all the steps in order to make this tutorial small, but Mirone line editing allows you to break and join lines so that we can end up with closed lines (polygons), change the elements stack order so that one polygon doesn't hide all others inside it, etc... Those closed lines must be converted to patches (another entity) in order to allow color filling.
Convert polylines to patches
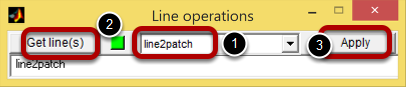
You must choose the "line2patch" option and select the line you want to convert by hitting the "Get lines(s)" button and next double-clicking on the line of interest. The red square will turn green. Do this for all the lines you want to convert. With patches we can paint them and obtain the next figure.
And now we really finished. All it rest is to save the symbol, like explained above, and use it. For example the following GMT commands will create figures of the line only and the filled versions of this symbol (where corto_lines and corto_patches were names I used to save each version of this symbol).
The Line only symbol
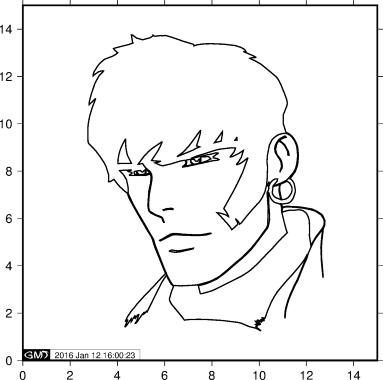
Obtained with:
echo 9 7.5 | psxy -Skcorto_lines/10c -R0/15/0/15 -JX12c -UBL/0/0 -P > corto_lines.ps
psconvert corto_lines.ps -Tf -A
The filled symbol
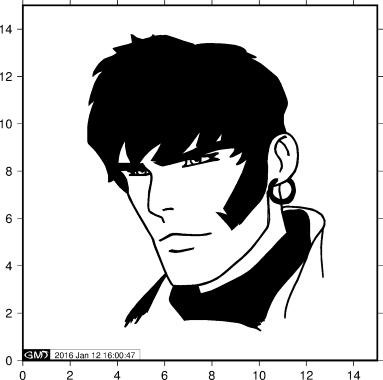
obtained with:
echo 9 7.5 | psxy -SKcorto_patches/10c -R0/15/0/15 -JX12c -Ba2WSen -UBL/0/0 -P > corto_patches.ps
psconvert corto_patches.ps -Tg -A